This video would guide you through on how to register to CompHub Work Portal.
Reset Password
This video would guide you through on how to reset your password of CompHub Work Portal.
CompHub Inbox
This video would guide you through the inbox of CompHub Work Portal.
Attorney Proxy Assignment
This video would guide you through on how to do the Attorney Proxy Assignment in CompHub Work Portal.
Upload Exhibit Instructions
This is to guide you through Upload Exibits Process.
The Upload Exhibits request allows a user to Upload Exhibits, the Consent to Pay Fees and the Affidavit. Any information, including the hearing date will be pulled from the underlying Claim File.
Enter the Claimant details Claim Number, Claimant First, Last Name, Employer details,HealthCare Provider details.
Enter the Claim info or Review the Claim Information retrieved from the system and select Exhibits, Consent to Pay Fees and Costs, and/or Claimants Affidavit.
Any field marked with Red means mandatory information and needs to be completed.
Upload the documentation for anything you selected 'Yes' for by clicking the document upload icon.
Death & Funeral Benefits Instructions
This is to guide you through the Death & Funeral benefits Process.
When you first begin the Death & Funeral benefits process you have the option to select one of two filing options:
"Dependents Claim for Death Benefits" and
"Claim for Funeral Benefits Only".
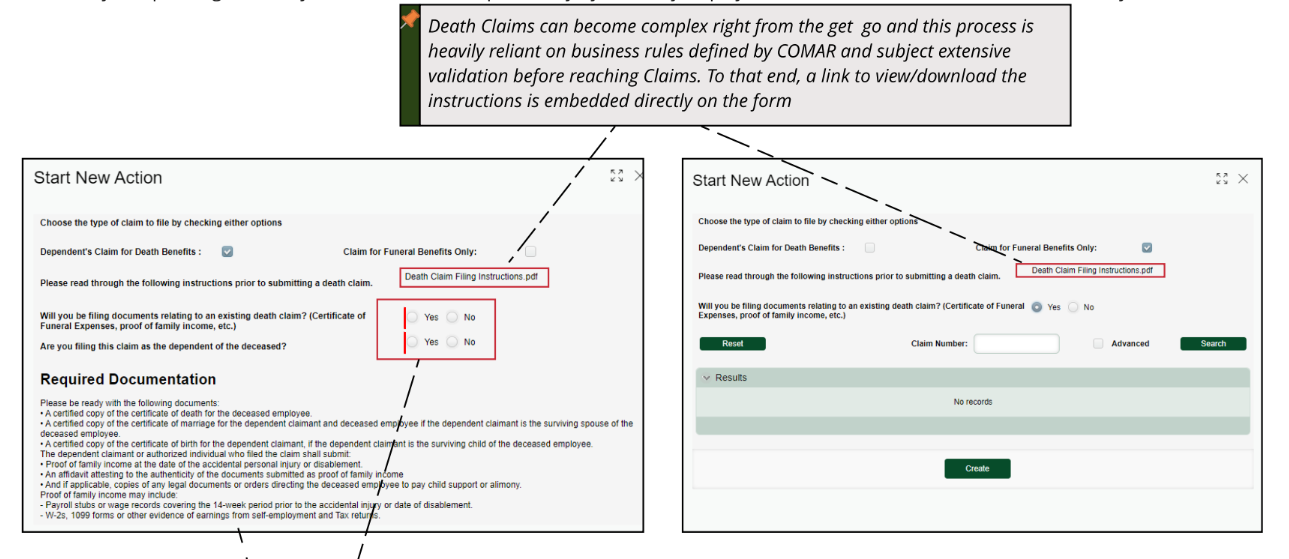
Depending on what your selection is, CompHub may dynamically display additional fields.These Start Forms are likely the most extensive in CompHub.
Death Claims can become complex right from the get go and this process is heavily reliant on business rules defined by COMAR and subject extensive validation before reaching Claims. To that end, a link to view/download the instructions is embedded directly on the form
If the Dependent's Claim for Death Benefits is chosen, CompHub will display a new section called Required documentation and additional selections will appear and options will become mandatory .
Any field marked with red means mandatory information and needs to be completed.
If there is an existing Death Claim, users can also add required documentation through this process, these additional documents will be approved by the Claims Division before being added.
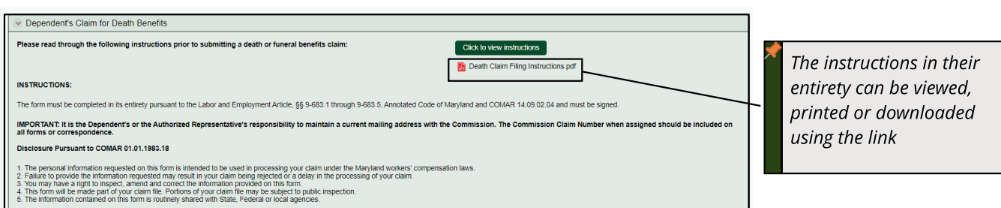
User Submission: The Death Claim Form(s) are some of the most extensive throughout CompHub. Downloading the instructions and working through the form section by section will result in a successful filing.
The instructions in their entirety can be viewed, printed or downloaded using the link.
Fill out the Deceased Information section (Data will prepopulate if linked to an existing W-claim)
Enter the Filing Party information, you can specify your status as a dependent here if applicable.
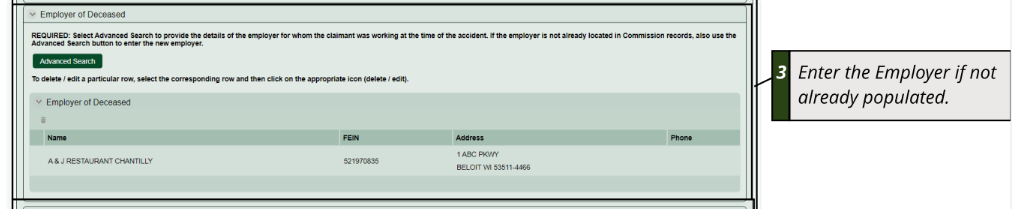
Enter the Employer if not already populated.
Use the Death Claim information section to enter information regarding the cause of death.
Dependents may be added using the "Dependents Information" table.
Don't forget to attach any required documentation.
Claimant Change of Address Instructions
This is to guide you through Claimant Change of Address Process.
The Claimant Change of Address process allows a user from the Claimant or Claimant Attorney Role to change the Claimant's listed address on a Claim or Claims. To change the address on file, use the Update Profile process.
Select the Claim(s) using the checkbox controls.
Any field marked with Red means mandatory information and needs to be completed.
Enter the new address and use the Verify Address utility.
Don't forget to Certify and Sign!
If the new Address is found to be a match with the Attorney's address, the Attorney must provide written justification.
Request for Claim Access Instructions
This is to guide you through Request for Claim Access Process.
In order to facilitate proper medical care for an injured worker, a Healthcare Practitioner may request access to the Claim. This access lasts for 180 days if approved. Let's take a look at how these are received in CompHub.
Rudimentary Claim Information is displayed to the Healthcare Provider.
Any field marked with Red means mandatory information and needs to be completed.
Use the Provider Organization table to add records. Click the plus icon and search for the organization(s).
Enter the justification for your request.
Sign and certify the submission and submit it to the Commission. Note: The additional statement informing the user that if approved the request is only valid for 180 days, after which they will have to submit a new request.
After successful processing, CompHub will display the Claim Access Request PDF for you to view, print,and/or download.
Change of Venue Instructions
This is to guide you through Claimant Change of Venue Process.
The Change of Venue form is the beginning of the electronic process allowing a party to Request a Change of Venue for a scheduled Hearing.
Review the form for accuracy.
Any field marked with Red means mandatory information and needs to be completed.
Select a new Hearing Location using the dropdown menu.
Enter the reason for the Change of Venue should be granted.
Don't forget to Sign & Certify your submission!
Request for Transcript Instructions
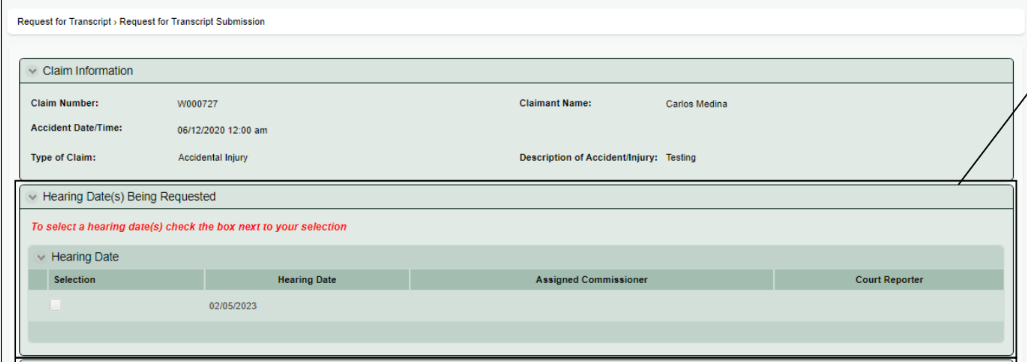
This is to guide you through Request a Transcript from the given Claim.
A user that is a party to a Claim can Request a Transcript from the given Claim. (Users that are not a party will file using the Transcript Subpoena form)
Select the Hearing you are requesting a transcript from. All hearings for the Claim are available for selection in the table
Any field marked with Red means mandatory information and needs to be completed.
Indicate whether or not the Order issued as a result of the respective hearingis being appealed.
Don't forget to Sign & Certify your submission!
Settlement Request
This video would guide you through on how to start a Request for Settlement.
Manage Practitioner CEUs Instructions
This is to guide you through Starting a Request for Settlement Process.
Practitioners may submit course and credit information to obtain CEUs.
Use the controls on the form to complete each section, note required fields and documents.
The "Course Requirements" section is collapsed by default, click the arrow to expand.
Any field marked with Red means mandatory information and needs to be completed.
Uplaod the required documents.
Don't forget to Sign & Certify your submission!
After your credits have been approved, CompHub will generate the PDF for you to view, print, and/or download.
Termination of Medical Benefits Instructions
This is to guide you through Termination of Medical Benifits Process.
Filing the C-10 is easier than ever! Just use the integrated form in CompHub to file, and get your submission processed quicker.
Review the top section of the form. It is pre-populated with basic Claim Information.
Enter the Termination Date manually or use the integrated date-picker. The form will only accept dates in the future. Note: The date will automatically default to the next day.
Any field marked with Red means mandatory information and needs to be completed.
Click the Plus Sign to add Healthcare Providers and services for which you are terminating.
Attach any relevant documentation using the table in the "Upload Document" Section
Don't forget to Certify and Sign! Check the appropriate boxes on the left side.
Termination of TTD Benefits Instructions
This is to guide you through Termination of TTD Benifits Process.
Filing the C-06 is easier than ever! Just use the integrated form in CompHub to file, and get your submission processed quicker.
Review the "Claim Details" section of the form. It is pre-populated with basic Claim Information.
Enter the Termination Date manually or use the integrated date-picker. The form will only accept dates in the future. Note:The date will automatically default to the next day.
Any field marked with Red means mandatory information and needs to be completed.
This section contains dynamically displayed controls. Based on which reason(s) you select, the system may display a new control to prompt you to enter additional information.
Attach any relevant documentation using the table in the "Upload Supporting Documents" Section.
Don't forget to Certify and Sign! Check the appropriate boxes on the left side.
User Profile Update
This video would guide you through on how to update the user profile.
Instructions to Circuit Court Order Submission
This is to guide you through Circuit Court Order Submission Process.
The Circuit Court Order Submission process allows a party to upload the Circuit Court's Decision and specify additional supporting information.
Review the Claim information listed on the form for accuracy.
Specify if the Claim is remanded from Circuit court using the checkbox.
Select the Circuit Court Decision using the drop-down.
The "Circuit Court Information" section is used to enter the Circuit Court Address, Order Date, upload the Order, and enter comments.
Instructions to Appeals
This is to guide you through Appeals Submission Process.
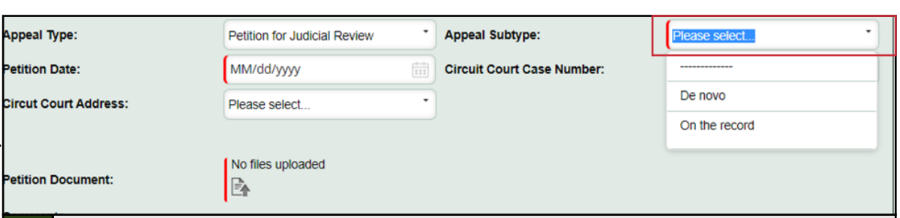
The appeals process begins with a user completing the new electronic Petition for Judicial Review form.
Select the "Appeal Type" and enter the "Petition Date". Note: That certain Appeal types may require an additional "Appeal Subtype" selection". Note: Any field marked with Red means mandatory information and needs to be completed.
Attach the Petition document to the submission. The Commission will review the document once the submission is received.
Enter any relevant comments that will expedite the processing of the case or otherwise support your submission.
Don't forget to Certify and Sign! Check the appropriate boxes on the left side.
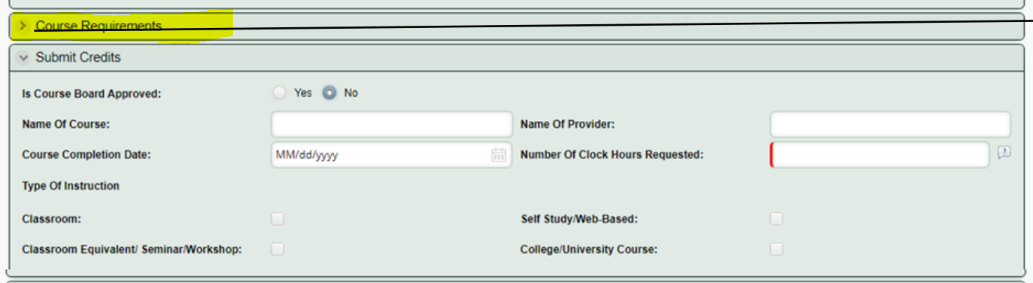
Instructions to Vocational Rehabilitation Registration
This is to guide you through Voc Rehab registration Process.
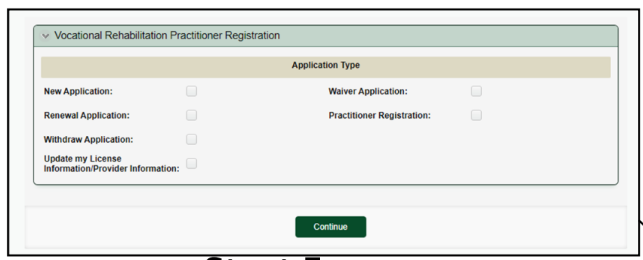
The Voc Rehab Registration process allows a Practitioner to complete Multiple use cases; Complete a new application, Complete a renewal application, Withdraw an Application, and Update their info.
Select the application type and click/tap Continue to open the proper form(s).
If you have selected the "New Application". Please provide all the required details. Note: Any field marked with Red means mandatory information and needs to be completed.
Don't forget to Certify and Sign! Check the appropriate boxes on the left side.
Please fill the Voc Rehab Quiz form.
If you have selected the "Renewal Application". Please provide all the required details.
This is to guide you through Voc Rehab Application Withdrawal Process
The Withdrawal Application option allows the user to withdrawal their application by providing a reason, Support Services must then process the case by completing the "Remove Practitioner" form.
Once you have selected to Withdraw their submission you will be prompted to provide a reason.
Please provide the appropriate reason for Withdrawal.
Request for Modification Instructions
This is to guide you through Request for Modification Process.
The Request for Modification form is the start of the streamlined electronic process, filing new issues is streamlined and automated where applicable.
Enter the Order Date using the datepicker and select a justification using the textbox. Note: Any field marked with Red means mandatory information and needs to be completed.
- If "The Claimant'spermanent disability hasincreased" is chosen, the 'Worsening' issue will be auto selected.
- If "The Claimant'spermanent disability hasdecreased" is chosen, the 'Betterment' issue will be auto selected.
File any additional issues using the fully integrated Issues form (Not all issues pictured, see user manual for full list)
Add any attachments and then its time to Sign & Certify.
Once the system finishes processing the submission, you will receive an electronic notification via email.
Emergency Hearing Request Instructions
This is to guide you through Emergency Hearing Request Process.
The Emergency Hearing Request process allows a user to request an expedited hearing given the justification warrants such. Issues may also be filed through this process and the submission form has plenty of information to assist in a proper filing. This information is spread across three tab.
Enter the required Justification for Expedited processing using the textbox provided. New Issues may also be filed at this point with the integrated Issues form. Note: Any field marked with Red means mandatory information and needs to be completed.
The second tab of the Emergency Hearing Request list any Claims in the "Set With Group" as they will be automatically postponed in the case of approval.
The third tab "Issues", allows you to view the previously filed Issues in the case as well as the C40.
Claim Withdrawal Instructions
This is to guide you through Withdrawal of Claim Request Process.
The Claim Withdrawal process is a one form, one step process for withdrawing a WCC Claim.
Select the Withdrawal Type using the drop down. Note: Any field marked with Red means mandatory information and needs to be completed.
If Duplicate Claim is chosen you will have an opportunity to identify the duplicate Claim if known..
If 'Other' is chosen, provide the justification in the text box provided.
Claims in a "Set With Group" are withdrawn together, CompHub will automatically display any Claims that are set with the underlying Claim.
Don't forget to Certify and Sign! Check the appropriate boxes on the left side.
Voc Rehab Plan
This video would guide you through on Voc Rehab Plan in CompHub Work Portal.
This is to guide you through Voc Rehab 30-Day Progress Report.
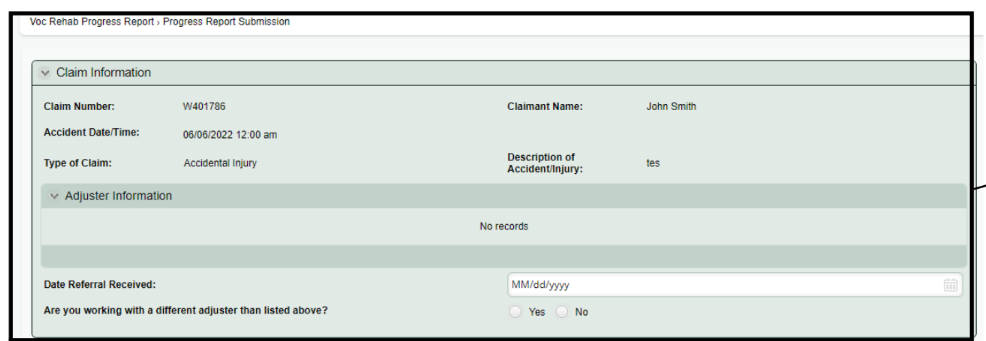
The 30-day progress report can be submitted in it's entirety in CompHub. The electronic form is responsive and comprehensive. Once you're finished CompHub will generate the Progress Report for you!
Review the Claim Information and Adjuster Information for Accuracy. Enter the Referral Date and specify employment.
Complete the Progress Report using the textboxes,datepickers, and other controls available to you.
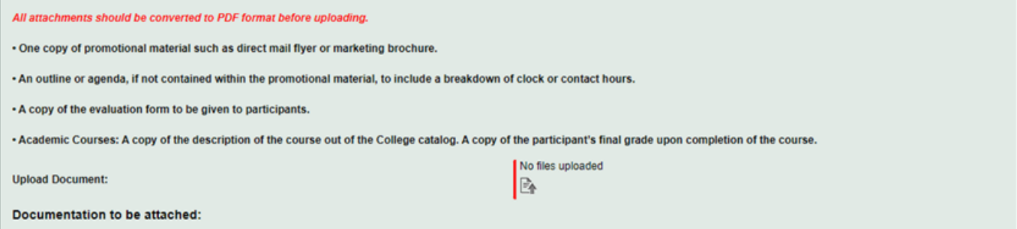
Attach your documentation using the "Upload Required Documents section". Note: Any field marked with Red means mandatory information and needs to be completed.
Don't forget to Certify and Sign! Check the appropriate boxes on the left side.
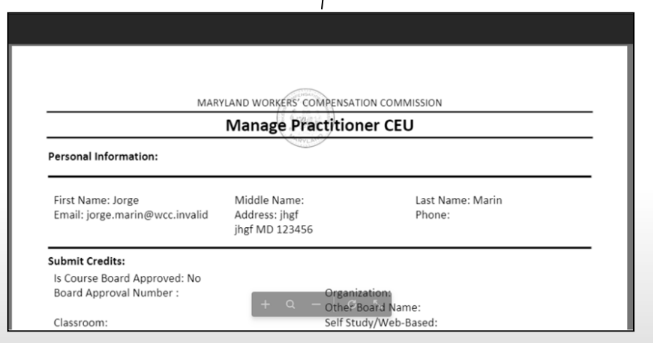
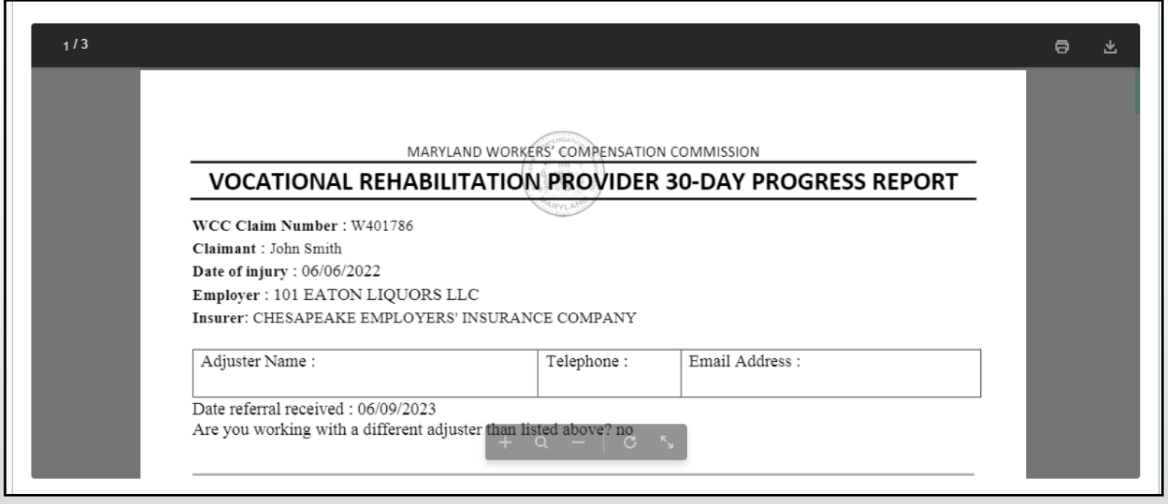
CompHub will generate the 30-Day Progress report for you to view, print, and/or download the document.
Create/Manage Set with Group Instructions
This is to guide you through Create Set with Group Process.
Getting Claims set to be heard with together (i.e. Creating a Set With Group) is simple and streamlined through the new CompHub process. Simply search for the primary Claim and get started. Keep in mind Claims in a Set With Group are linked until otherwise specified.
Review the form for accuracy.
Search for any Claims you would like to add to the Set With Group by clicking Claim Search. If you accidentally add a Claim you can always use the trash icon to delete. Note: Any field marked with Red means mandatory information and needs to be completed.
CompHub Generates the Set with Request document to view,print,and/or download.
This is to guide you through Manage Set with Group Process.
Managing a Set With Group is just as easy, if not easier than creating one. Simply select "Manage Existing Group" on the Start Form and the Manage Set With group form displays with in-line instructions.
When selecting the Claim, ensure the "Manage Set With Group" box is checked.
The Form lists the current Set with Group for Clarity. Use the Manage existing Set With Table controls to add or remove the set with group.
Issue Request Instructions
This is to guide you through Issues Request Process.
One of the first noticeable changes to the Issues process users will notice is the C40 automation and consolidation with Issues. In the case on Insured claims the Insurer and Insurer Attorney may complete the C40 and file Issues. On uninsured Claims Attorneys representing the Employer, SIF, UEF, may complete the C40 and file Issues. A process activity will automatically be generated.
Clicking 'Complete C40' will take the user into the Issues form with the Response to Claim (C-40) section amended on with all of the applicable choices.
This is to guide you through Raising Issues process
Issues are selected via the checkbox controls, the available issues will differ by the the participant type in the underlying Claim.
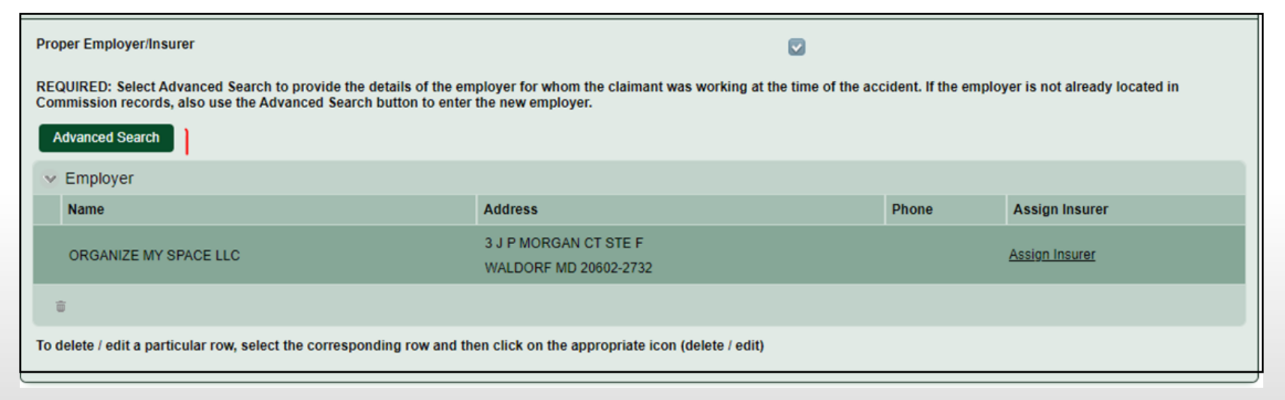
Certain options like Duplicate Claim and Proper Employer/Insurer will lead CompHub to display dynamic fields for additional entry.
This is to guide you through Raising Issues Cont.
Proper Insurer.
Proper Employer.
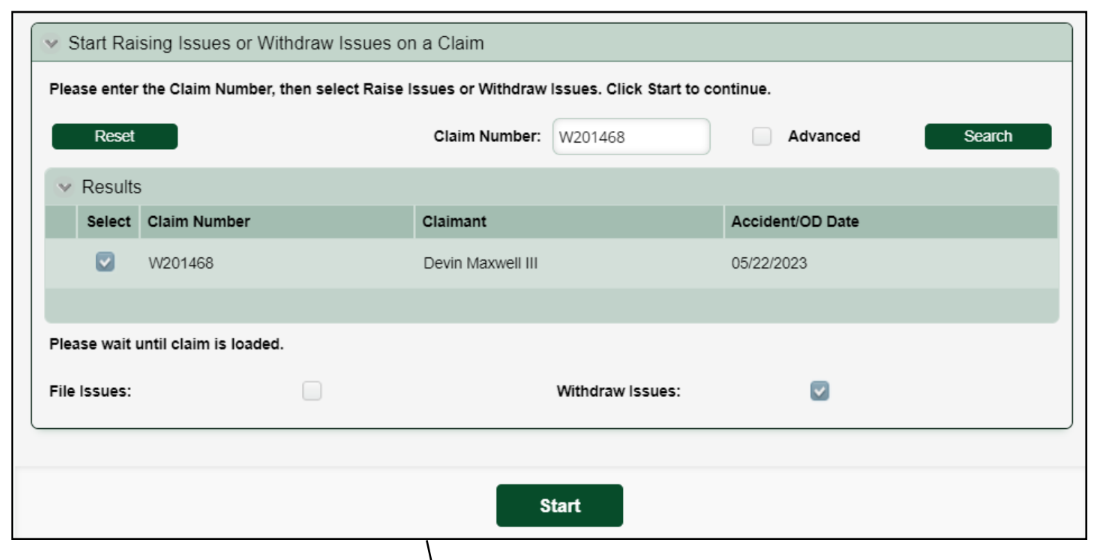
This is to guide you through Withdrawing Issues Process
Filing and Withdrawing issues are consolidated through the Start Form. In order to Withdraw all issues filed, you simply need to select Withdraw Issues and create the case. Keep in mind withdrawing issues may have implications.
Use the Start Form to specify a Claim and select the Withdraw Issues checkbox.
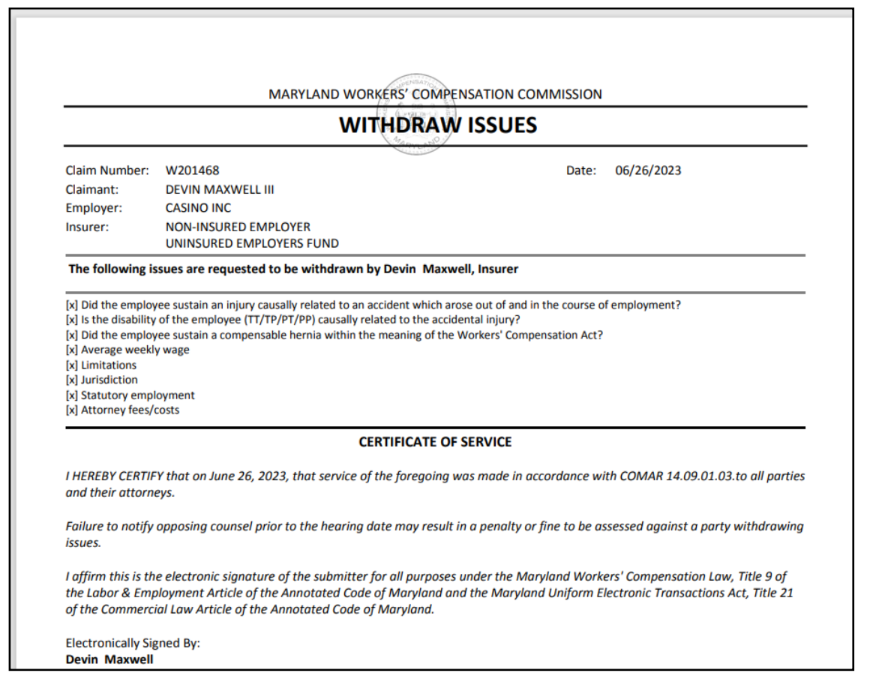
CompHub Generates the Withdrawal Issues document to view,print,and/or download.
Enter/Withdraw Appearance Insructions
This is to guide you through Enter or Withdraw Appearance Process.
Entering or Withdrawing your appearance from a Claim is now a streamlined and consolidated process. Both options use the same start form but display dynamic fields based on your selection.
Identify the underlying Claim by filling in the textboxes. The Claim Number and an additional piece of identifying information is required.
Select wheather you are Entering or Withdrawing your appearance using the checkboxes provided.
If Withdraw Appearance is selected, additional options will be displayed.
This is to guide you through Enter Appearance Process
To Enter your appearance simply select the Party type, sign, and submit. If you are representing an organization CompHub will prompt you to select the Organizations from the Claim File.
Based on the Party Type you may need to provide the Employer/Insurer.
Choose the Party using the dropdown and specify your status as the primary attorney.Don't forget to Sign and Certify!
CompHub Generates the Enter Appearance document to view,print,and/or download.
This is to guide you through Withdrawing Appearance Process
Withdrawing your Appearance requires identifying the Claim and specifying that you are in fact withdrawing, along with other supplemental information. Depending on the options chosen the Motion to Withdraw or Notice of Withdrawal Form will display.
Select Withdraw appearance and if applicable; select whether the client has another attorney of record and if the claim has been settled with no possibility of any further medical benefits.
This is to guide you through The Motion to Withdraw or Notice to Withdraw Appearance Process
The Motion to Withdraw or Notice to Withdraw Form is used to complete the withdrawal. See the forms below for the required fields.
Complete the plan using the textboxes and controls available. Attach the required documentation. Note: Any field marked with Red means mandatory information and needs to be completed.
Don't forget to Certify and Sign! Check the appropriate boxes on the left side.
CompHub Generates the Withdrawal Appearance document to view,print,and/or download.
First Report of Injury (FROI)
This video would guide you through on how to file a FROI.
Login to CompHub Work Portal
This video would guide you through on how to login to CompHub Work Portal.
File a Claim
This video will guide you through filing a claim by an unregistered user.
File a Claim by Registered User
This video will guide you through filing a claim by a registered user in CompHub Work Portal.
File a Claim By Attorney
This video will guide you through filing a claim by an attorney in CompHub Work Portal.
An attorney must be logged into CompHub in order to file a claim on behalf of claimant.
Claim Amendment by Attorney
This video will guide you through filing a claim amendment by an attorney in CompHub Work Portal.
An attorney must be logged into CompHub in order to file a claim amendment on behalf of claimant.
Claim Amendment by Claimant
This video will guide you through filing a claim amendment by an claimant in CompHub Work Portal.
Claimant Affidavit
This video will guide you through filing a claimant affidavit in CompHub Work Portal.
Consent to Pay Fees and Costs
This video will guide you through filing the consent to pay fees and costs in CompHub Work Portal.
Claim at a Glance
This video will guide you through the Claim at a glance in CompHub Work Portal.
LumpSum Request
This video will guide you through filing a LumpSum request in CompHub Work Portal.
Request for Continuance
This video will guide you through filing a request for Continuance in CompHub Work Portal.
Request for Rehearing
This video will guide you through filing a request for Rehearing in CompHub Work Portal.